Getting Started with Model Context Protocol Part 1: Add a Simple MCP Server to Claude Desktop
April 12, 2025
This post provides a simple, minimal example of setting up and using an MCP (model context protocol) server for use with Claude Desktop.
There are many MCP guides and tutorials and docs out there. In this one, I attempt to start with very simple implementations with as little complexity as possible in order to get started as quickly as possible.
Future posts will add more complexity, showing how to use additional MCP abstractions like prompts and resources, how to write an MCP client in Python, and how to use LLMs from other providers with MCPs.
Introduction: MCP Concepts
Anthropic's Model Context Protocol (MCP) is intended to standardize the way applications give context (data, tools, prompts, etc.) to LLMs.
We can think of an application using MCP as having three components:
- Host: the host is the application, such as an IDE or a chat app, that manages connections to one or more MCP servers. The host application is what the end user typically interacts with.
- MCP Server(s): MCP servers provide a standardized interface to resources (such as databases, file systems, tools, etc.) that LLMs can access.
- Client(s): clients are components of the host application that maintain the connection with the MCP server(s). Each client corresponds to one server. A client facilitates requests to the server, receives responses, and relays them to the host or user.
For example, a user might type the following into a chat app (the host): "Give me information about order ORD-1234." The client component of the application will pass this query, along with a list of available tools, to the LLM. Suppose one of the tools gives the ability to query a database of order statuses. The LLM will respond with a "tool call" specifying the tool to use (the database query tool) and the arguments to provide (the order id). The client will then invoke the tool from the MCP server, get the results of the database query, and pass them along to the next step, which might mean asking the LLM to respond to the user based on the results.
Quickstart: Set up a Simple MCP Server and Use It with Claude Desktop
To get started, we will set up an MCP server that exposes a single function, get_secret_number, that simply returns a "secret number" to the LLM. When you ask an LLM with this capability for the secret number, it will invoke the tool and return the "secret number," verifying that it successfully used the MCP server.
We will install this server to the Claude desktop app, allowing you to use the server without setting up a custom client.
Setup
We will create a new Python environment using uv before writing the server code. If you haven't already done so, first install uv by running the following shell script (on Mac/Linux): curl -LsSf https://astral.sh/uv/install.sh | sh.
Next, create and initialize a new project directory.
mkdir mcp-demo
cd mcp-demo
uv init
Then install the MCP Python SDK with uv add "mcp[cli]" .This will also create a new Python virtual environment in your project directory, which you can activate with source.venv/bin/activate.
Define the MCP server
Next, create a file called server.py in your project directory with the following:
# server.py
from mcp.server.fastmcp import FastMCP

mcp = FastMCP("SecretServer")

@mcp.tool()
def get_secret_number() -> int:
    """Returns a predefined secret number."""
    return 13
This is all we need to define an MCP server we can use with Claude Desktop. Let's walk through this.
mcp = FastMCP("SecretServer")initializes the server framework provided by the SDK. This handles all the core functionality, including connection management and message routing. Note that you don't have to name thismcp, but doing so makes it easier to install the server to Claude Desktop. If you use another name, you may get the following:[04/12/25 08:11:08] ERROR No server object found in cli.py:151 /Users/dliden/git/mcp-examples/server.py. Please either: 1. Use a standard variable name (mcp, server, or app) 2. Specify the object name with file:object syntax@mcp.tool()is a decorator that registers the function it decorates (get_secret_number) to the MCP server we defined,mcp.- The
get_secret_numberfunction just returns the number 13 when invoked. Why this function for an example? It's just an easy way to verify that everything is working correctly. We will ask Claude for the secret number, and it will need to invoke the function to get it.
And that's it. This is a complete, usable MCP server that exposes one function for an LLM to use. Now let's add this to the Claude Desktop app.
Add the server to Claude Desktop
We can use the mcp command line tool to install our new server to the Claude Desktop app (install it here if you haven't already).
Install the MCP server
Install the mcp server for use with Claude Desktop as follows:
mcp install server.py
Configure the Claude Desktop app
I found that just installing the server as described above did not work without some manual adjustment of the configuration. In particular, I needed to modify the configuration to include the whole path to uv executable on my system. See this GitHub discussion for details.
To find the configuration, go to the settings menu in the Claude Desktop app, then navigate to the Developer tab. Select your MCP server and click "edit config."

This will open a finder window (on MacOS) showing the directory with the configuration file, claude_desktop_config.json. Open this with your preferred editor to access and update the config.
If you ran into a similar issue with uv, replace uv in the Command field with the full path the executable, which you can find with the which uv terminal command. For example, on my system, which uv returns /Users/dliden/.cargo/bin/uv, so I updated my config to look like this:
{
  "mcpServers": {
    "SecretServer": {
      "command": "/Users/dliden/.cargo/bin/uv",
      "args": [
        "run",
        "--with",
        "mcp[cli]",
        "mcp",
        "run",
        "/Users/dliden/git/mcp-examples/server.py"
      ]
    }
  }
}
Use the tool provided by the MCP Server
If you configured the MCP server correctly, you should now see two new icons in Claude desktop showing that Claude has access to the MCP server and to one or more tools from the server.
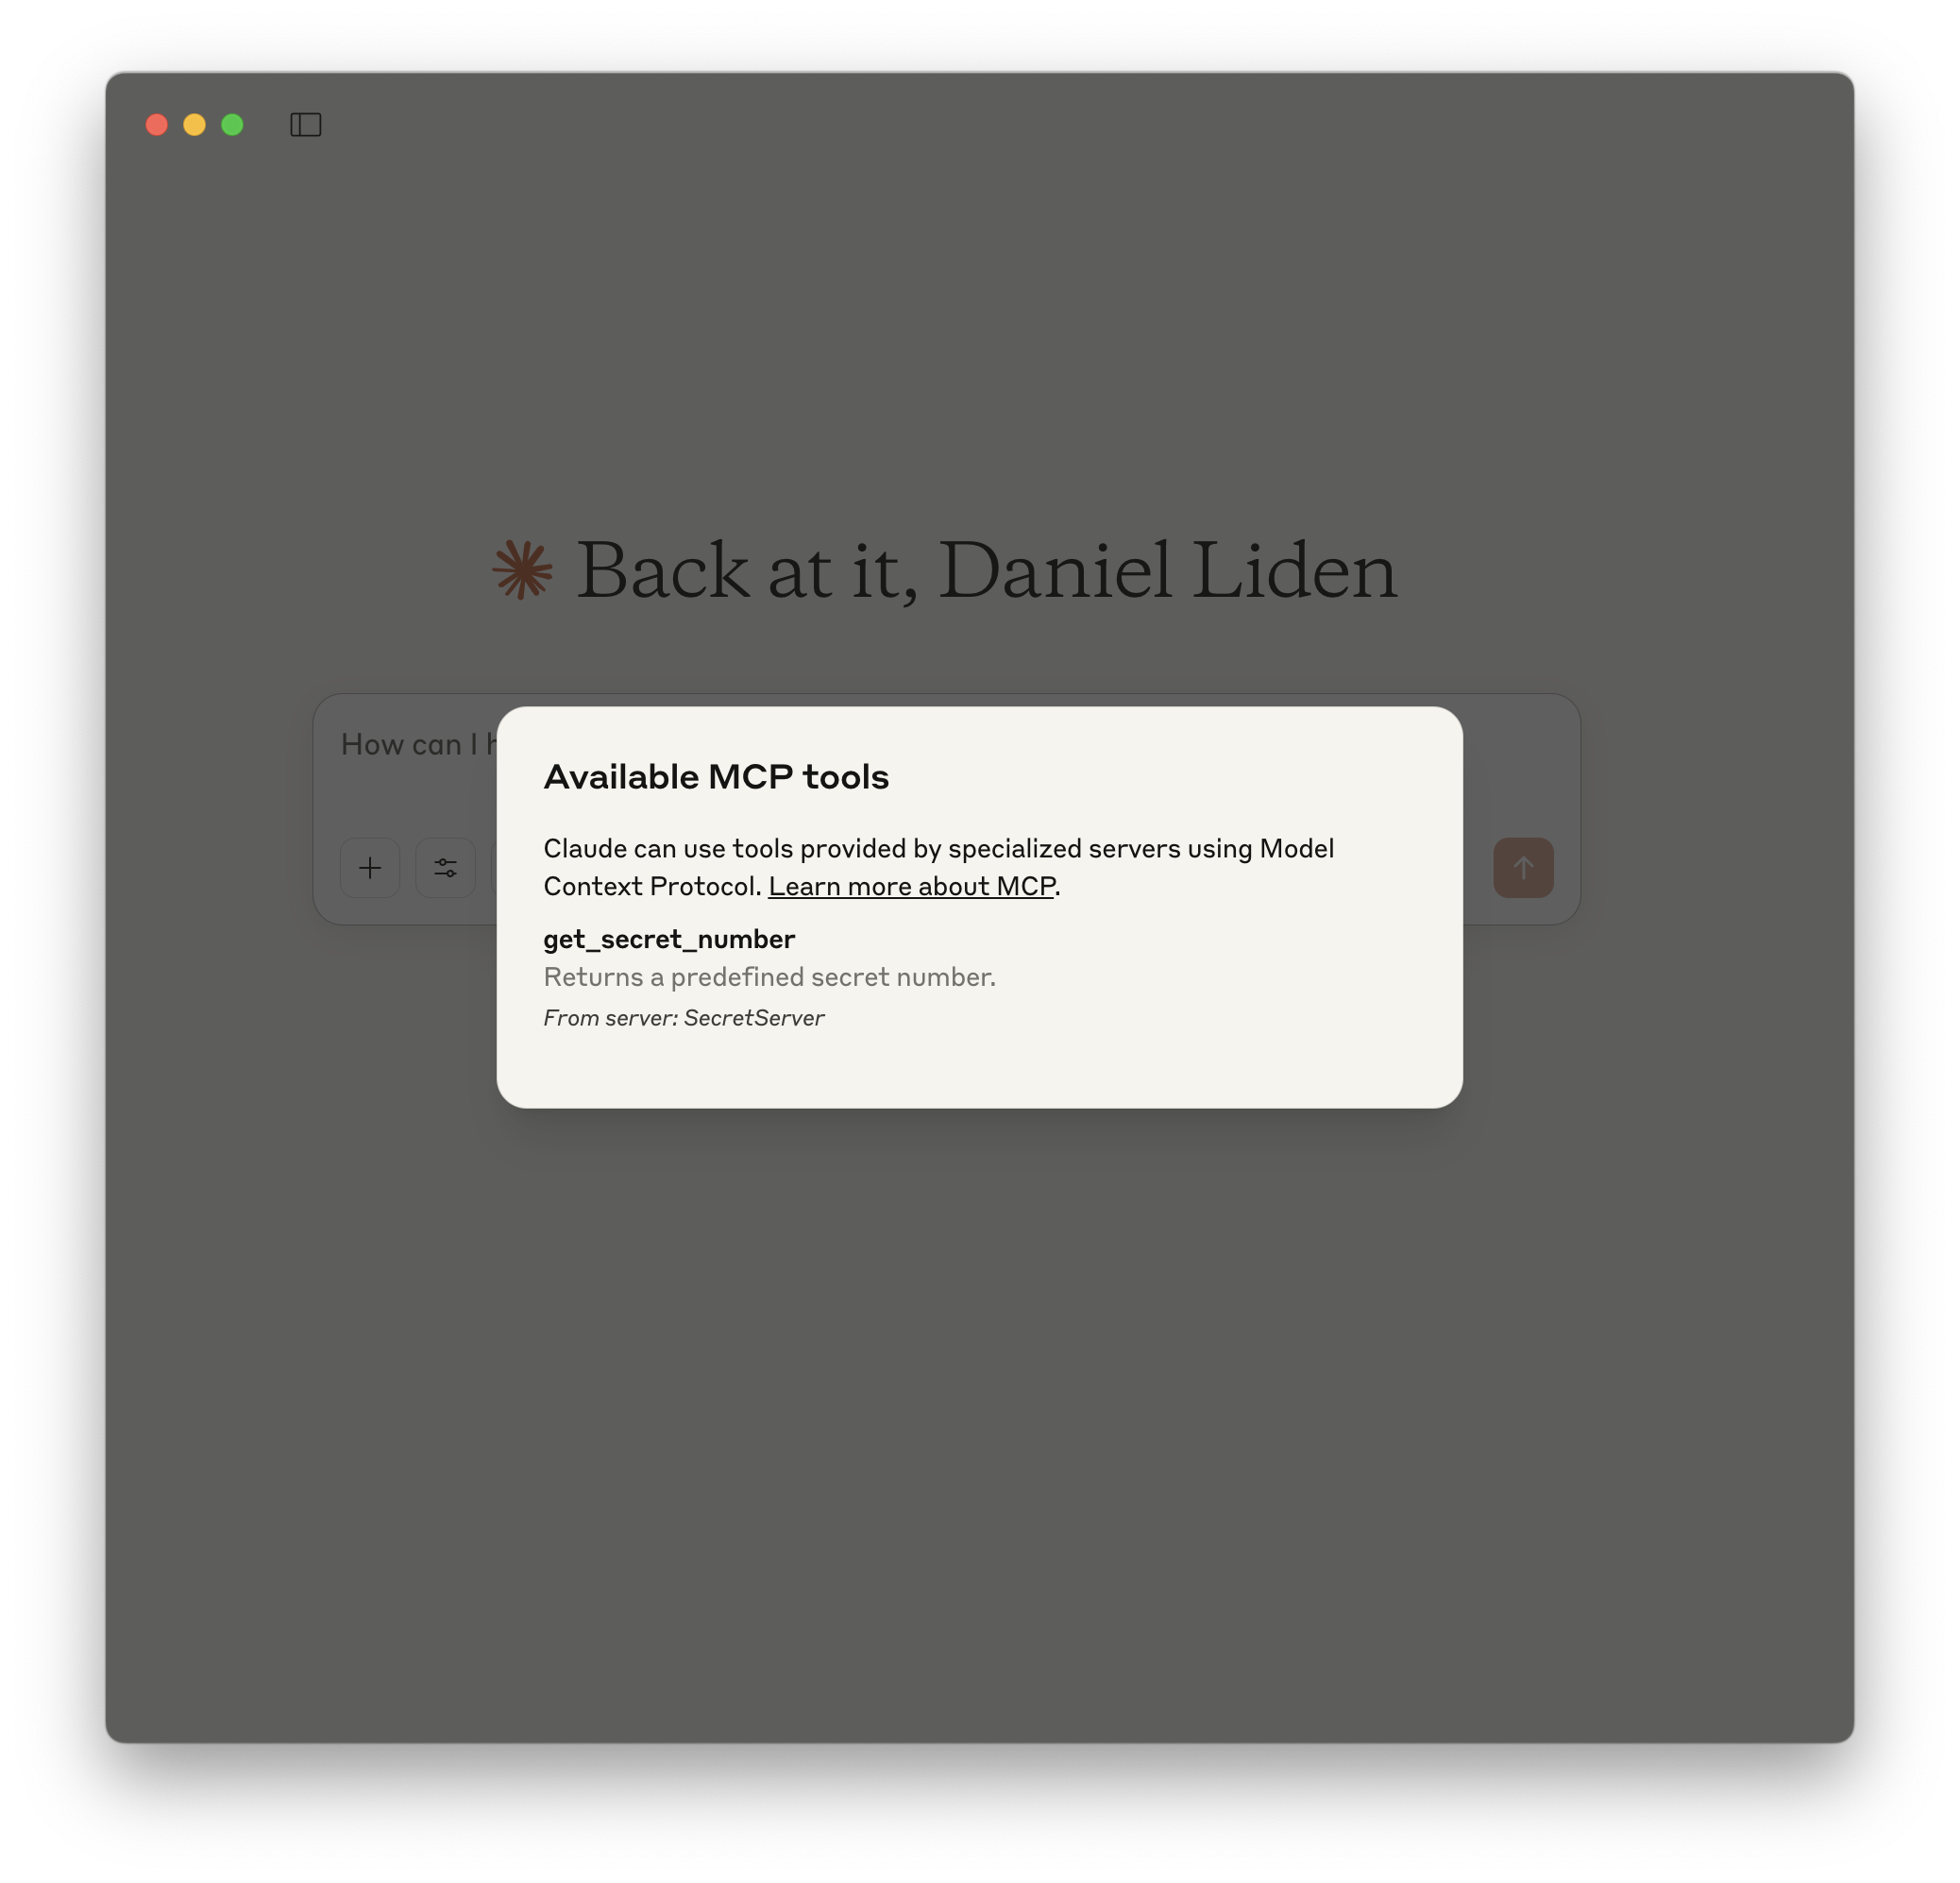
Clicking on the hammer icon will list the available tools and should show the secret number function we created.
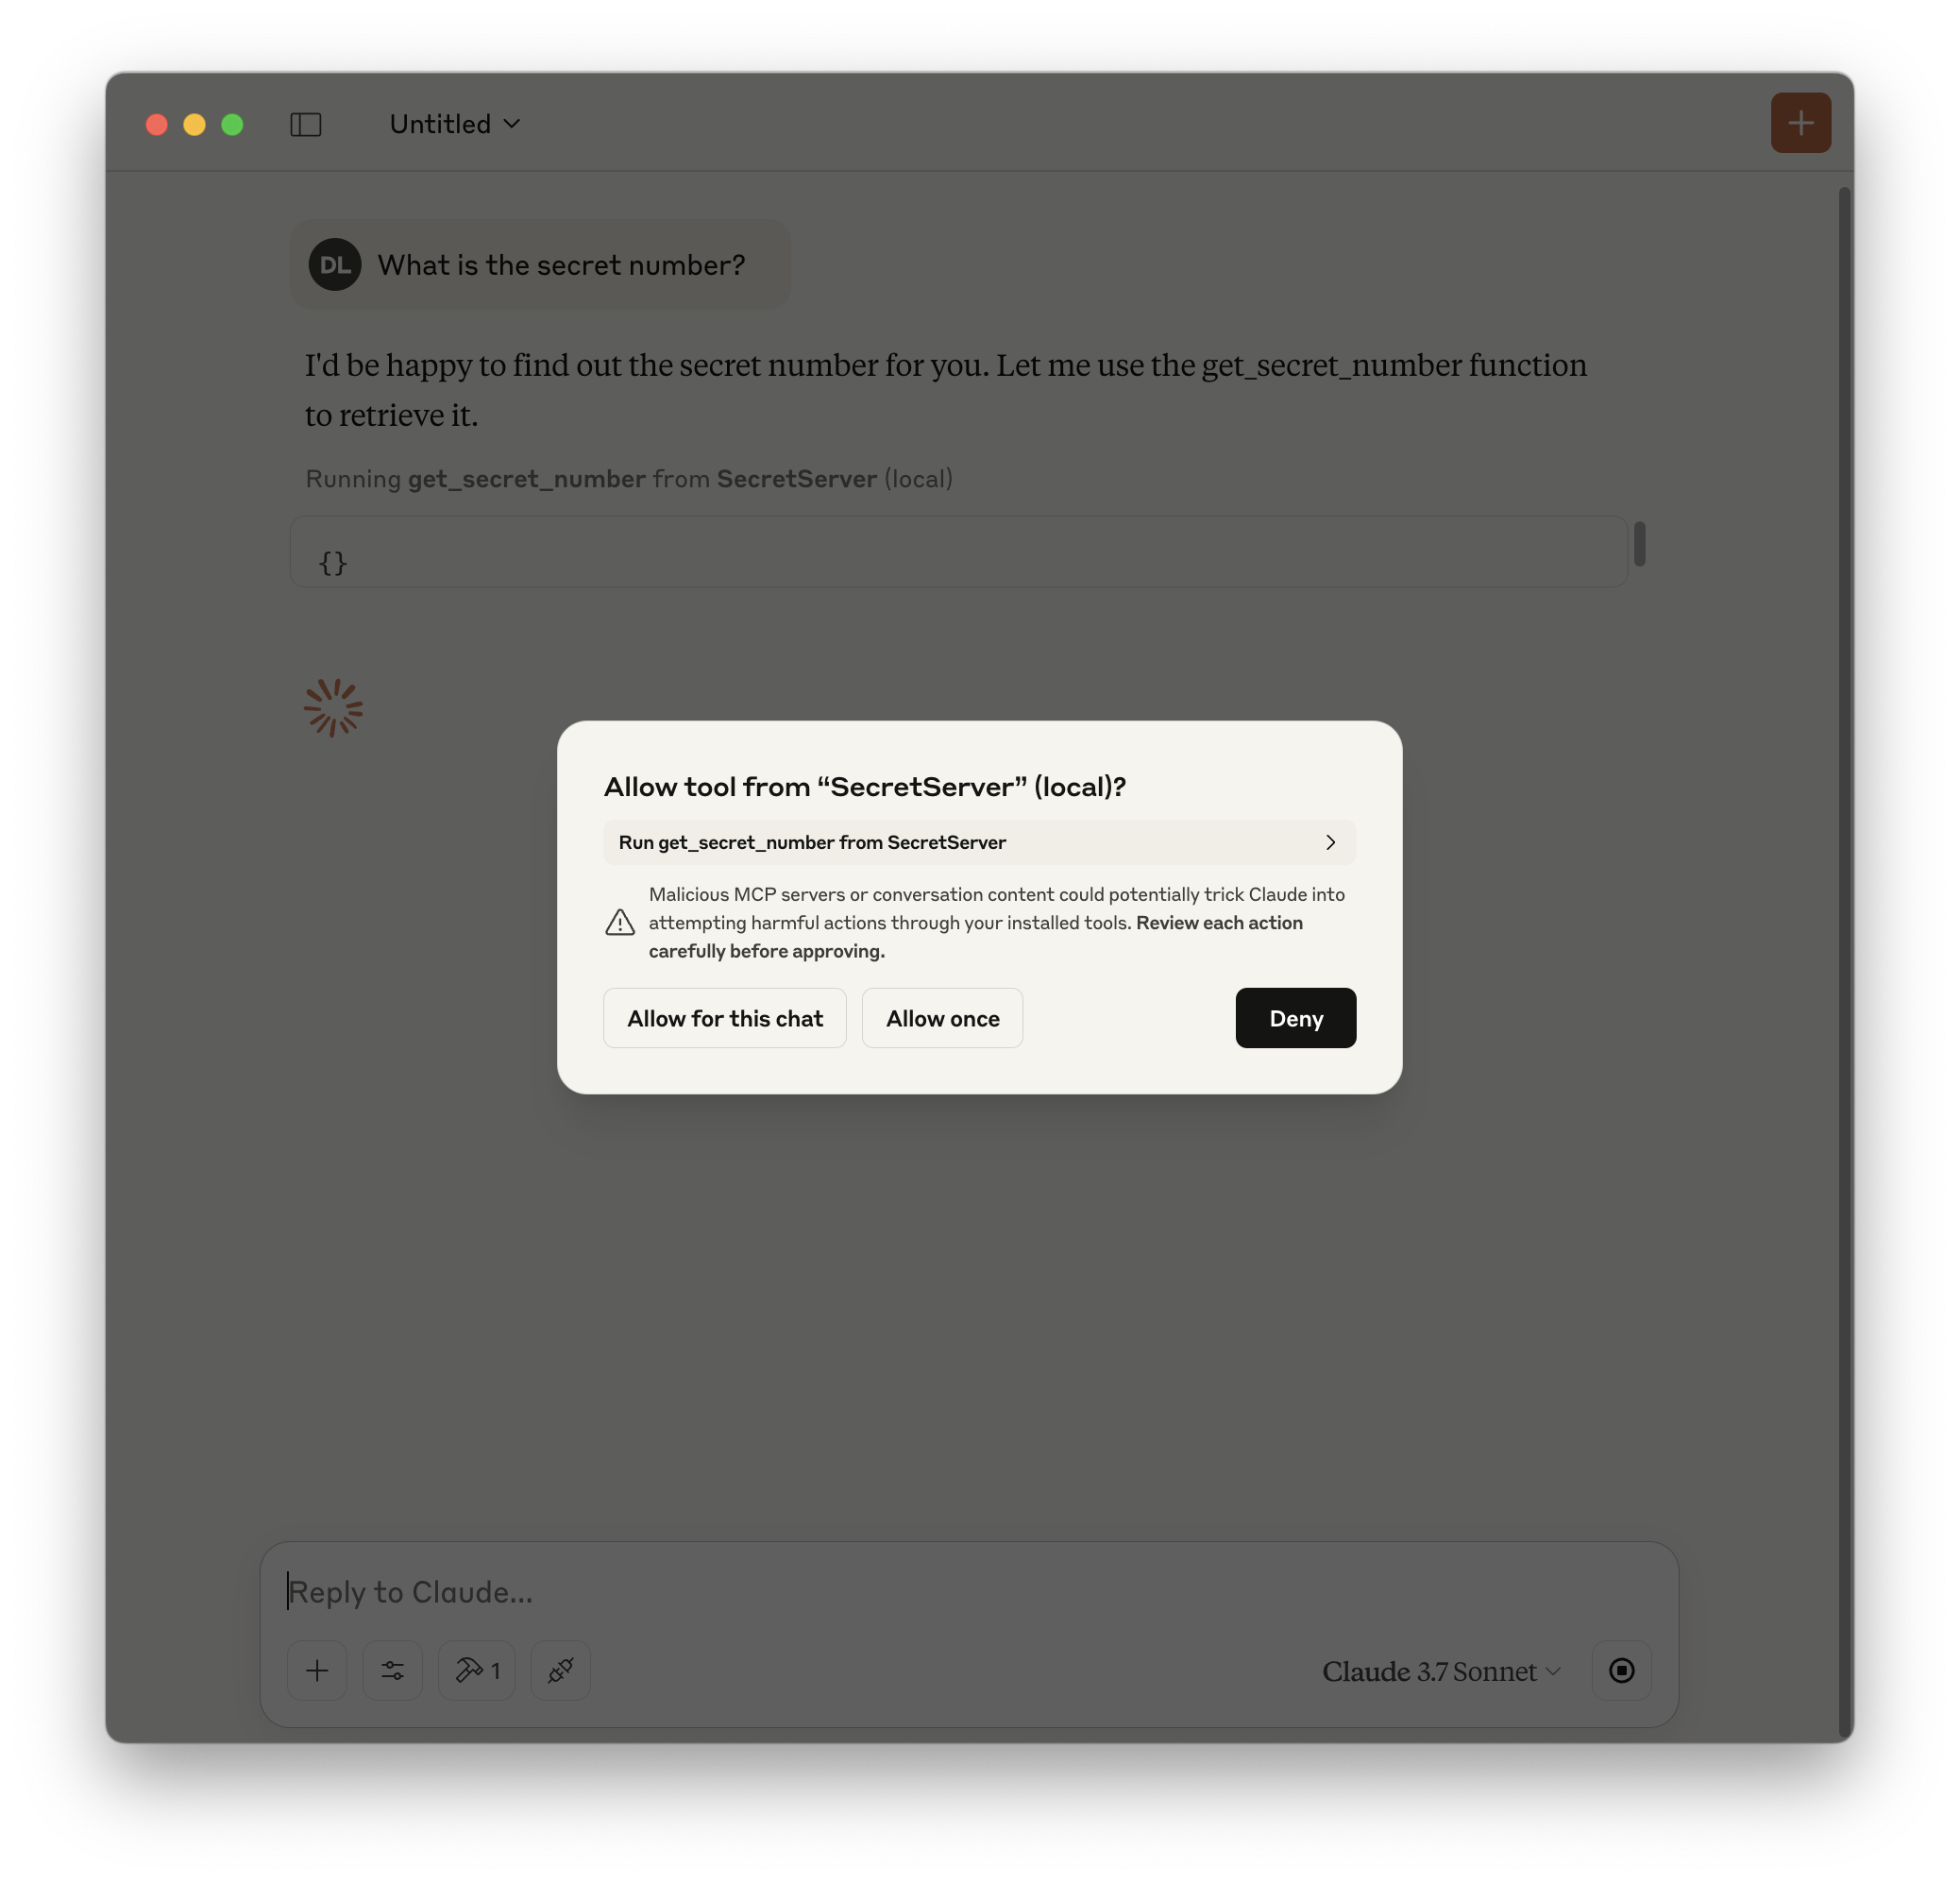
After confirming that Claude has access to the MCP, we can try it out. Simply ask Claude: "what is the secret number?"
Claude should know to use the function we created. A popup will appear asking for permission to use the function. Let's allow it.
Now Claude can use the tool to retrieve the secret number.
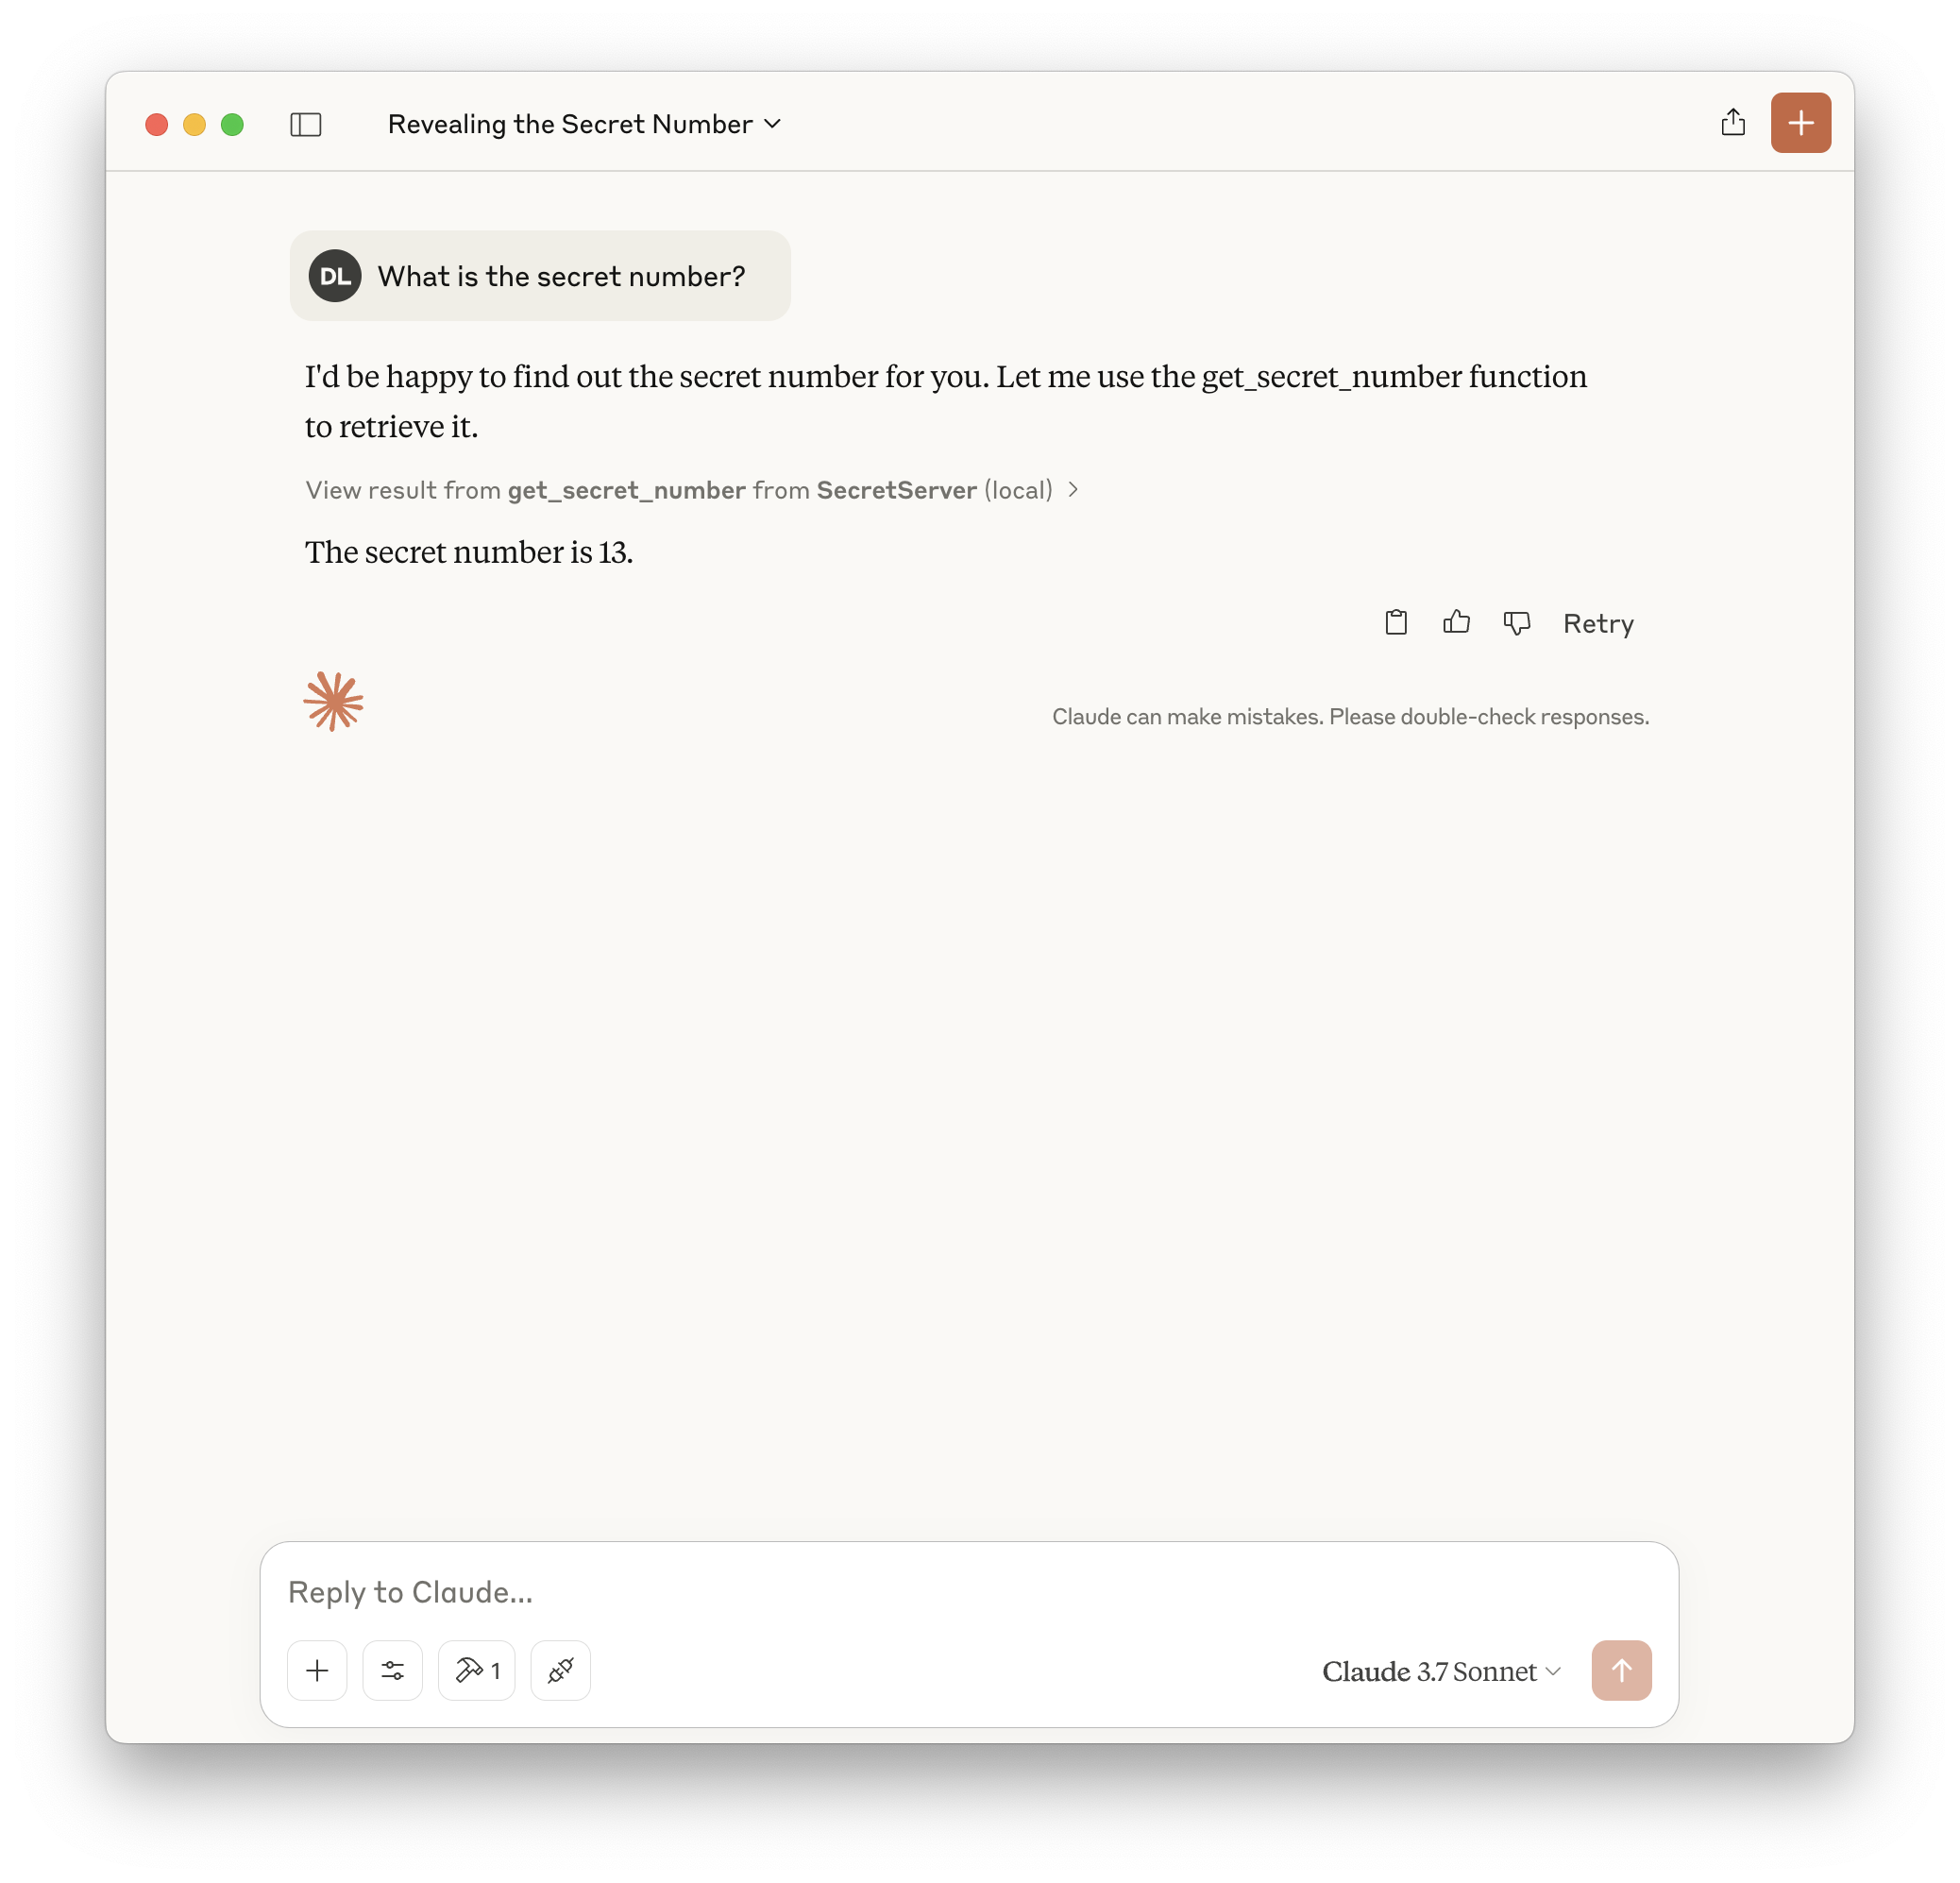
This demonstrates the basic pattern for setting up and MCP server and using it via the Claude Desktop app.
Recap and Next Steps
To recap, in this post, we set up a very minimal MCP server using the FastMCP method from the Python MCP SDK package. We defined a single tool that returns a "secret number" when invoked. We then installed the server to the Claude desktop app and confirmed that Claude could successfully invoke the tool via the MCP server to retrieve the secret number.
This minimal implementation is a good starting point for further exploration with MCP. From here, you can add more components to the server and test them with the Claude Desktop app. Some suggestions for next steps:
- Learn about resources, a mechanism for MCP servers to expose data to clients/LLMs. You can either directly expose resources or you can add tools enabling the LLM to query resources. More on this in a future post!
- Define and use prompts in your MCP server.
I will discuss these additional MCP components in my next post on the topic, and then write about how to create a custom MCP Client in Python.